Text and photos by Chloé Comte
__
A quick, gentle DIY is what I wanted to offer you during this summer period that calls for fareniente.
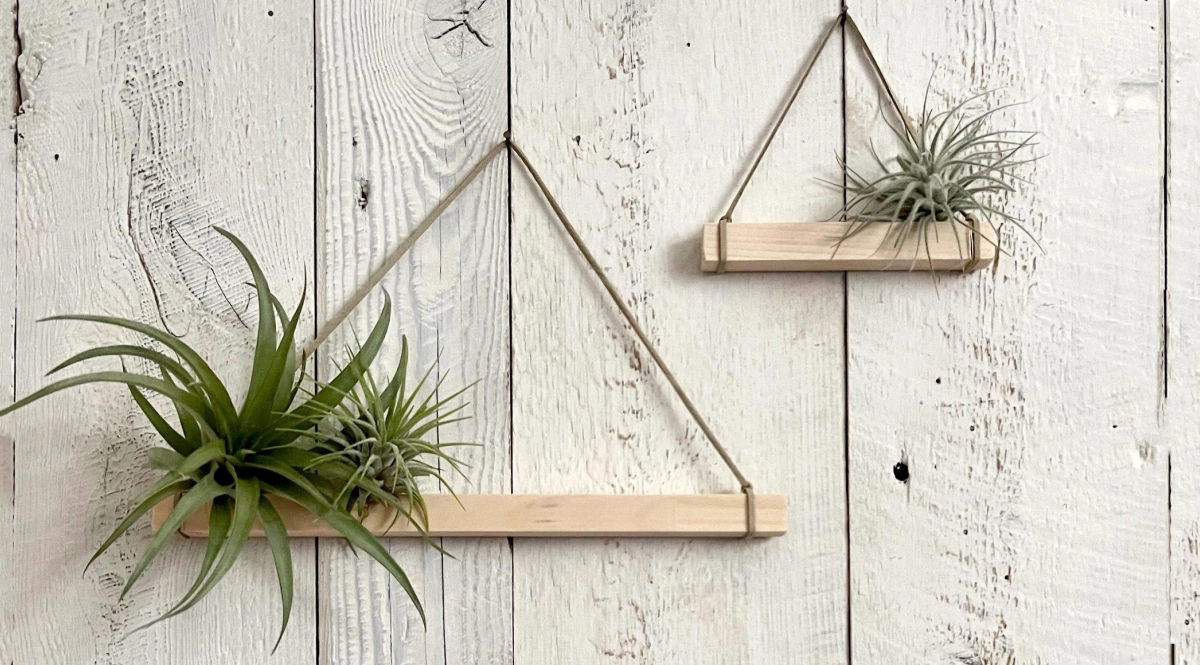
Create minimalist Tillandsia displays in a few easy steps, so you can easily add a touch of green to your walls.
Materials:

- Tillandsias
- 3/4 in x 3/4 in x 8 ft jointed pine rod
- Pencil
- Measuring tape
- Miter saw or wood saw
- Finishing sanding block (fine grit 320-220)
- 2mm suede cord
- Scissors
- Strong glue like super glue
- Fine golden wire
- Clear matte varnish (optional)
Steps:
Start by marking your jointed pine rod to the desired dimensions.
I made 3, in the following dimensions: 5, 8 & 11 inches.

Using a miter saw or a wood saw, cut 3 pieces.

Sand all your wooden rods to remove any possible splinters.

Tie the suede cord to each end of your rods with a well-tightened double knot.

Put a few drops of super glue on the knots to secure them. Cut off the excess cord.

Gently wrap a bit of fine golden wire around the base of your tillandsias, so you can hang them on your rods.

All that's left is to install your new decoration on the wall of your choice!

Tips and Tricks:
– I used jointed pine because it is reasonably priced and light enough for this type of small decoration.
– If you want to mist your tillandsias directly on your displays, I recommend protecting them by applying 2 coats of clear matte varnish.
Tips and advice


