
Text and photos by Laura Pigeon
__
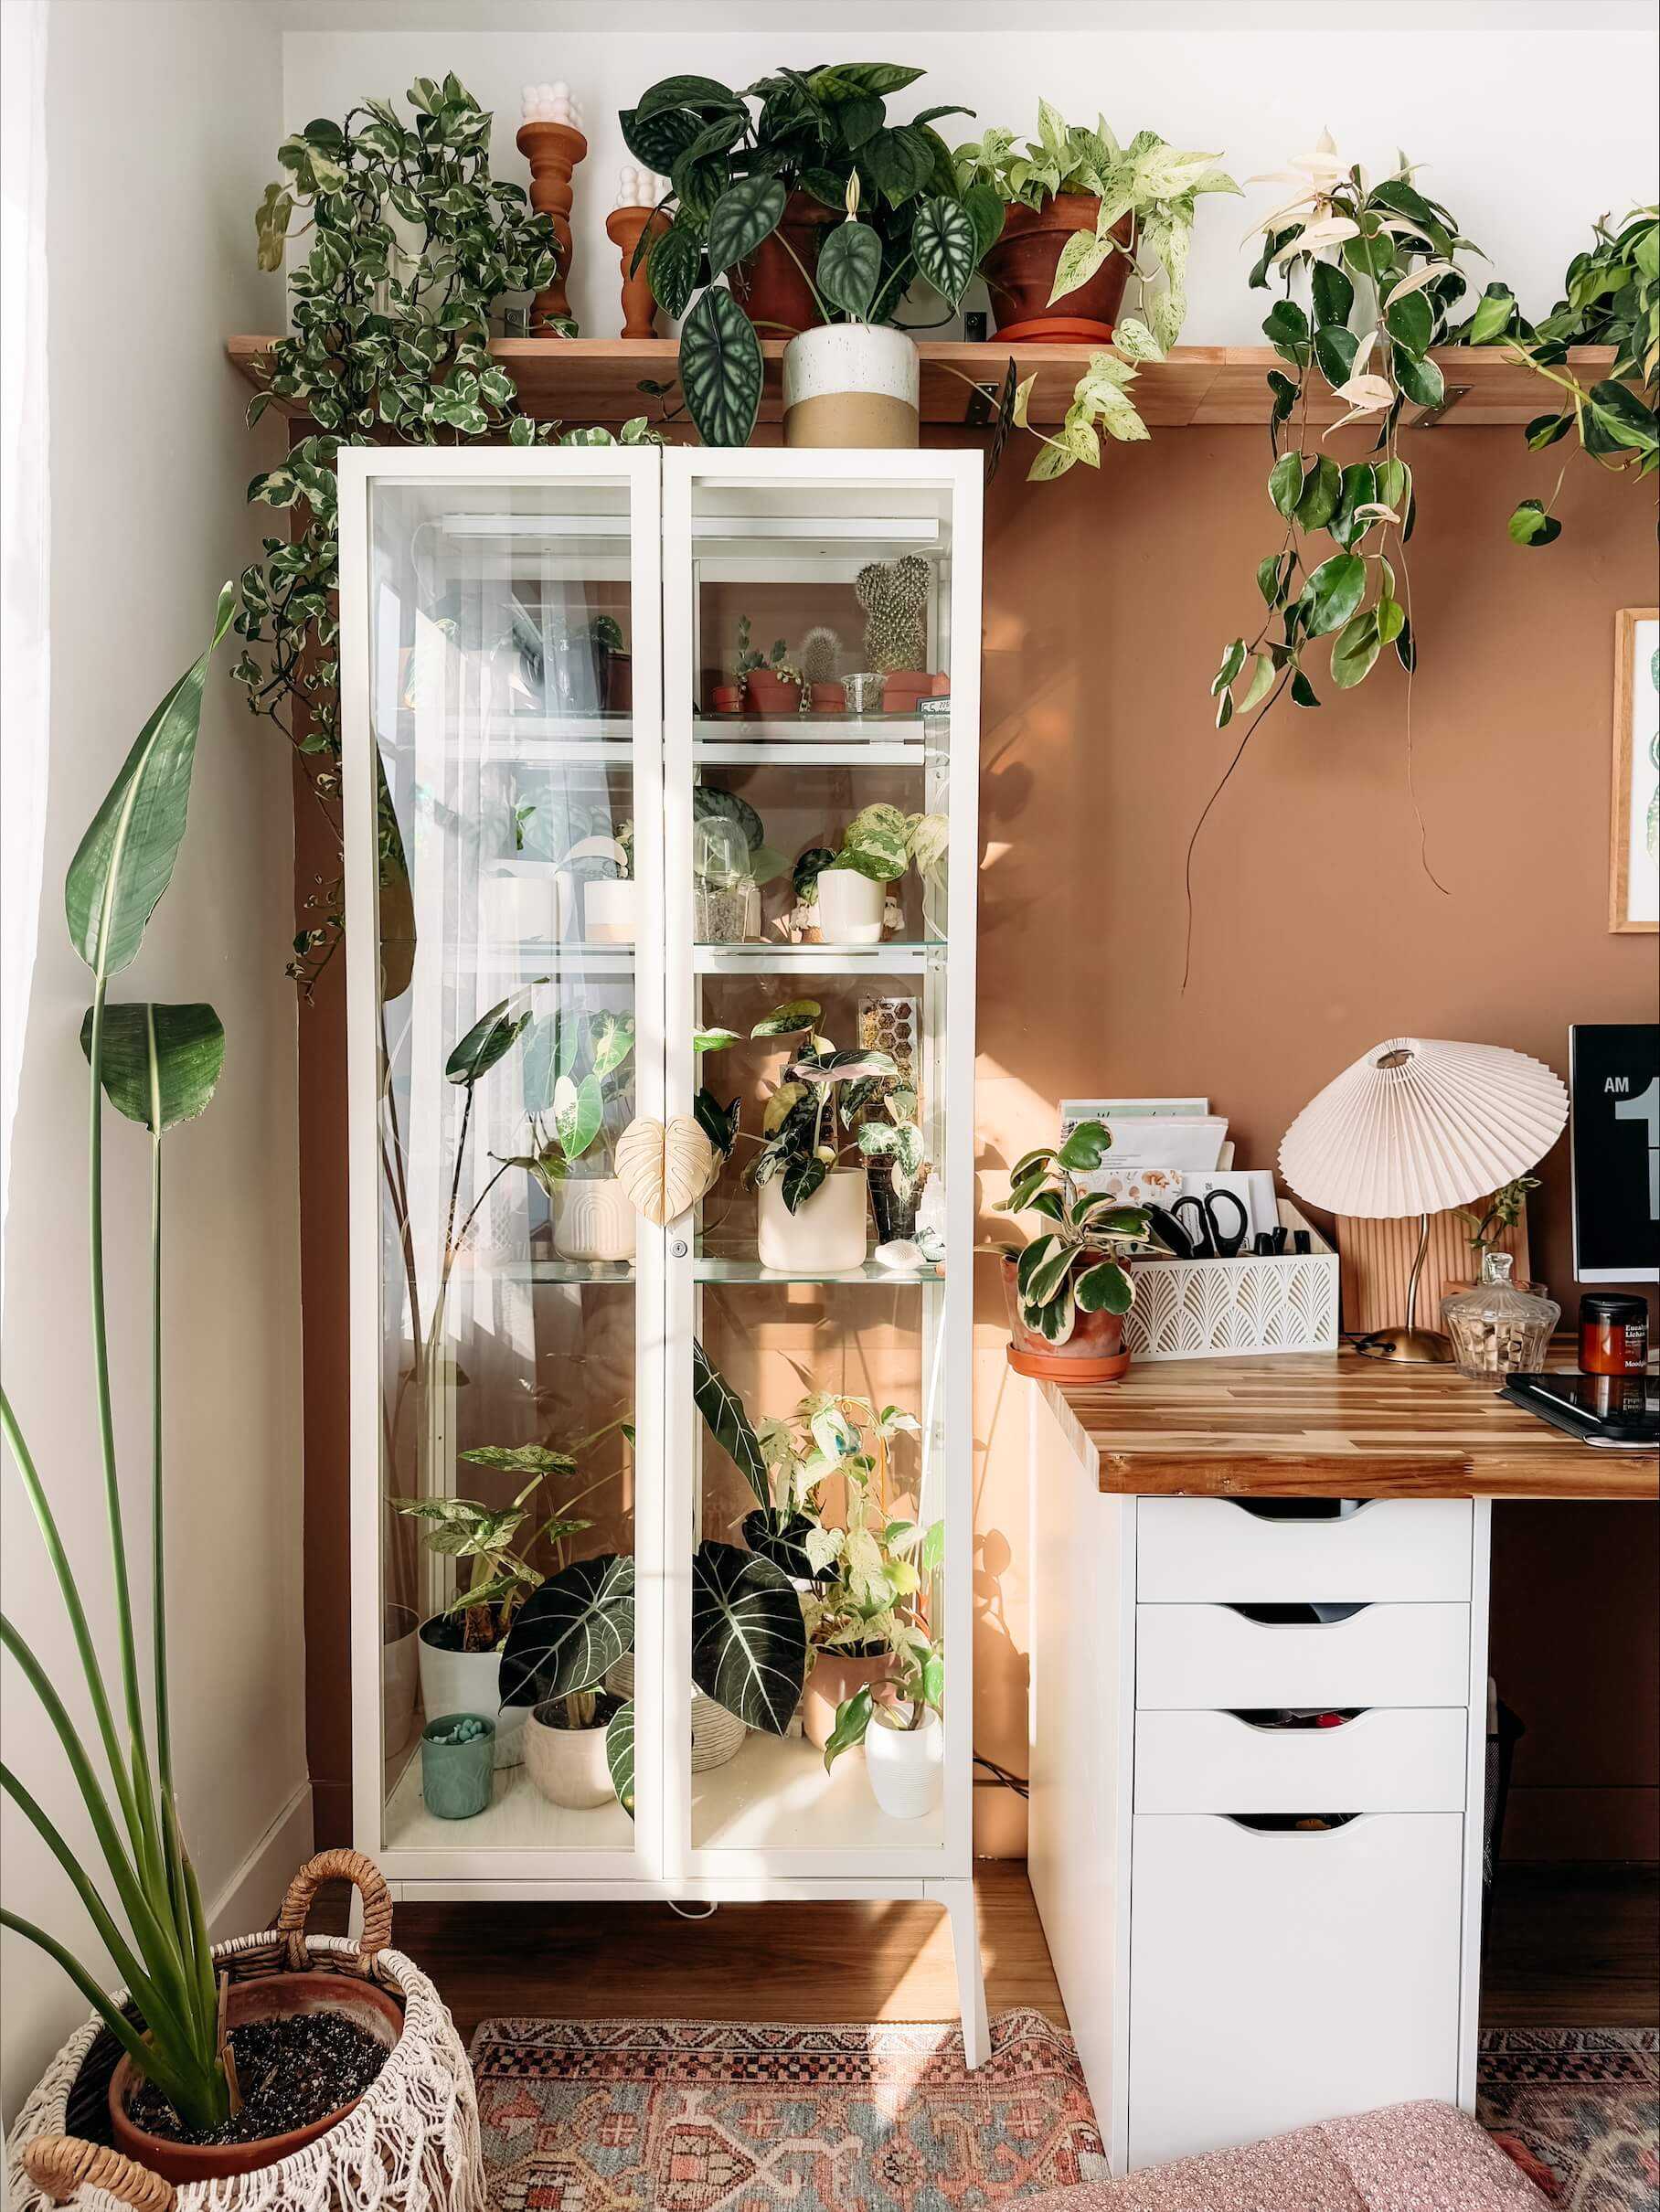
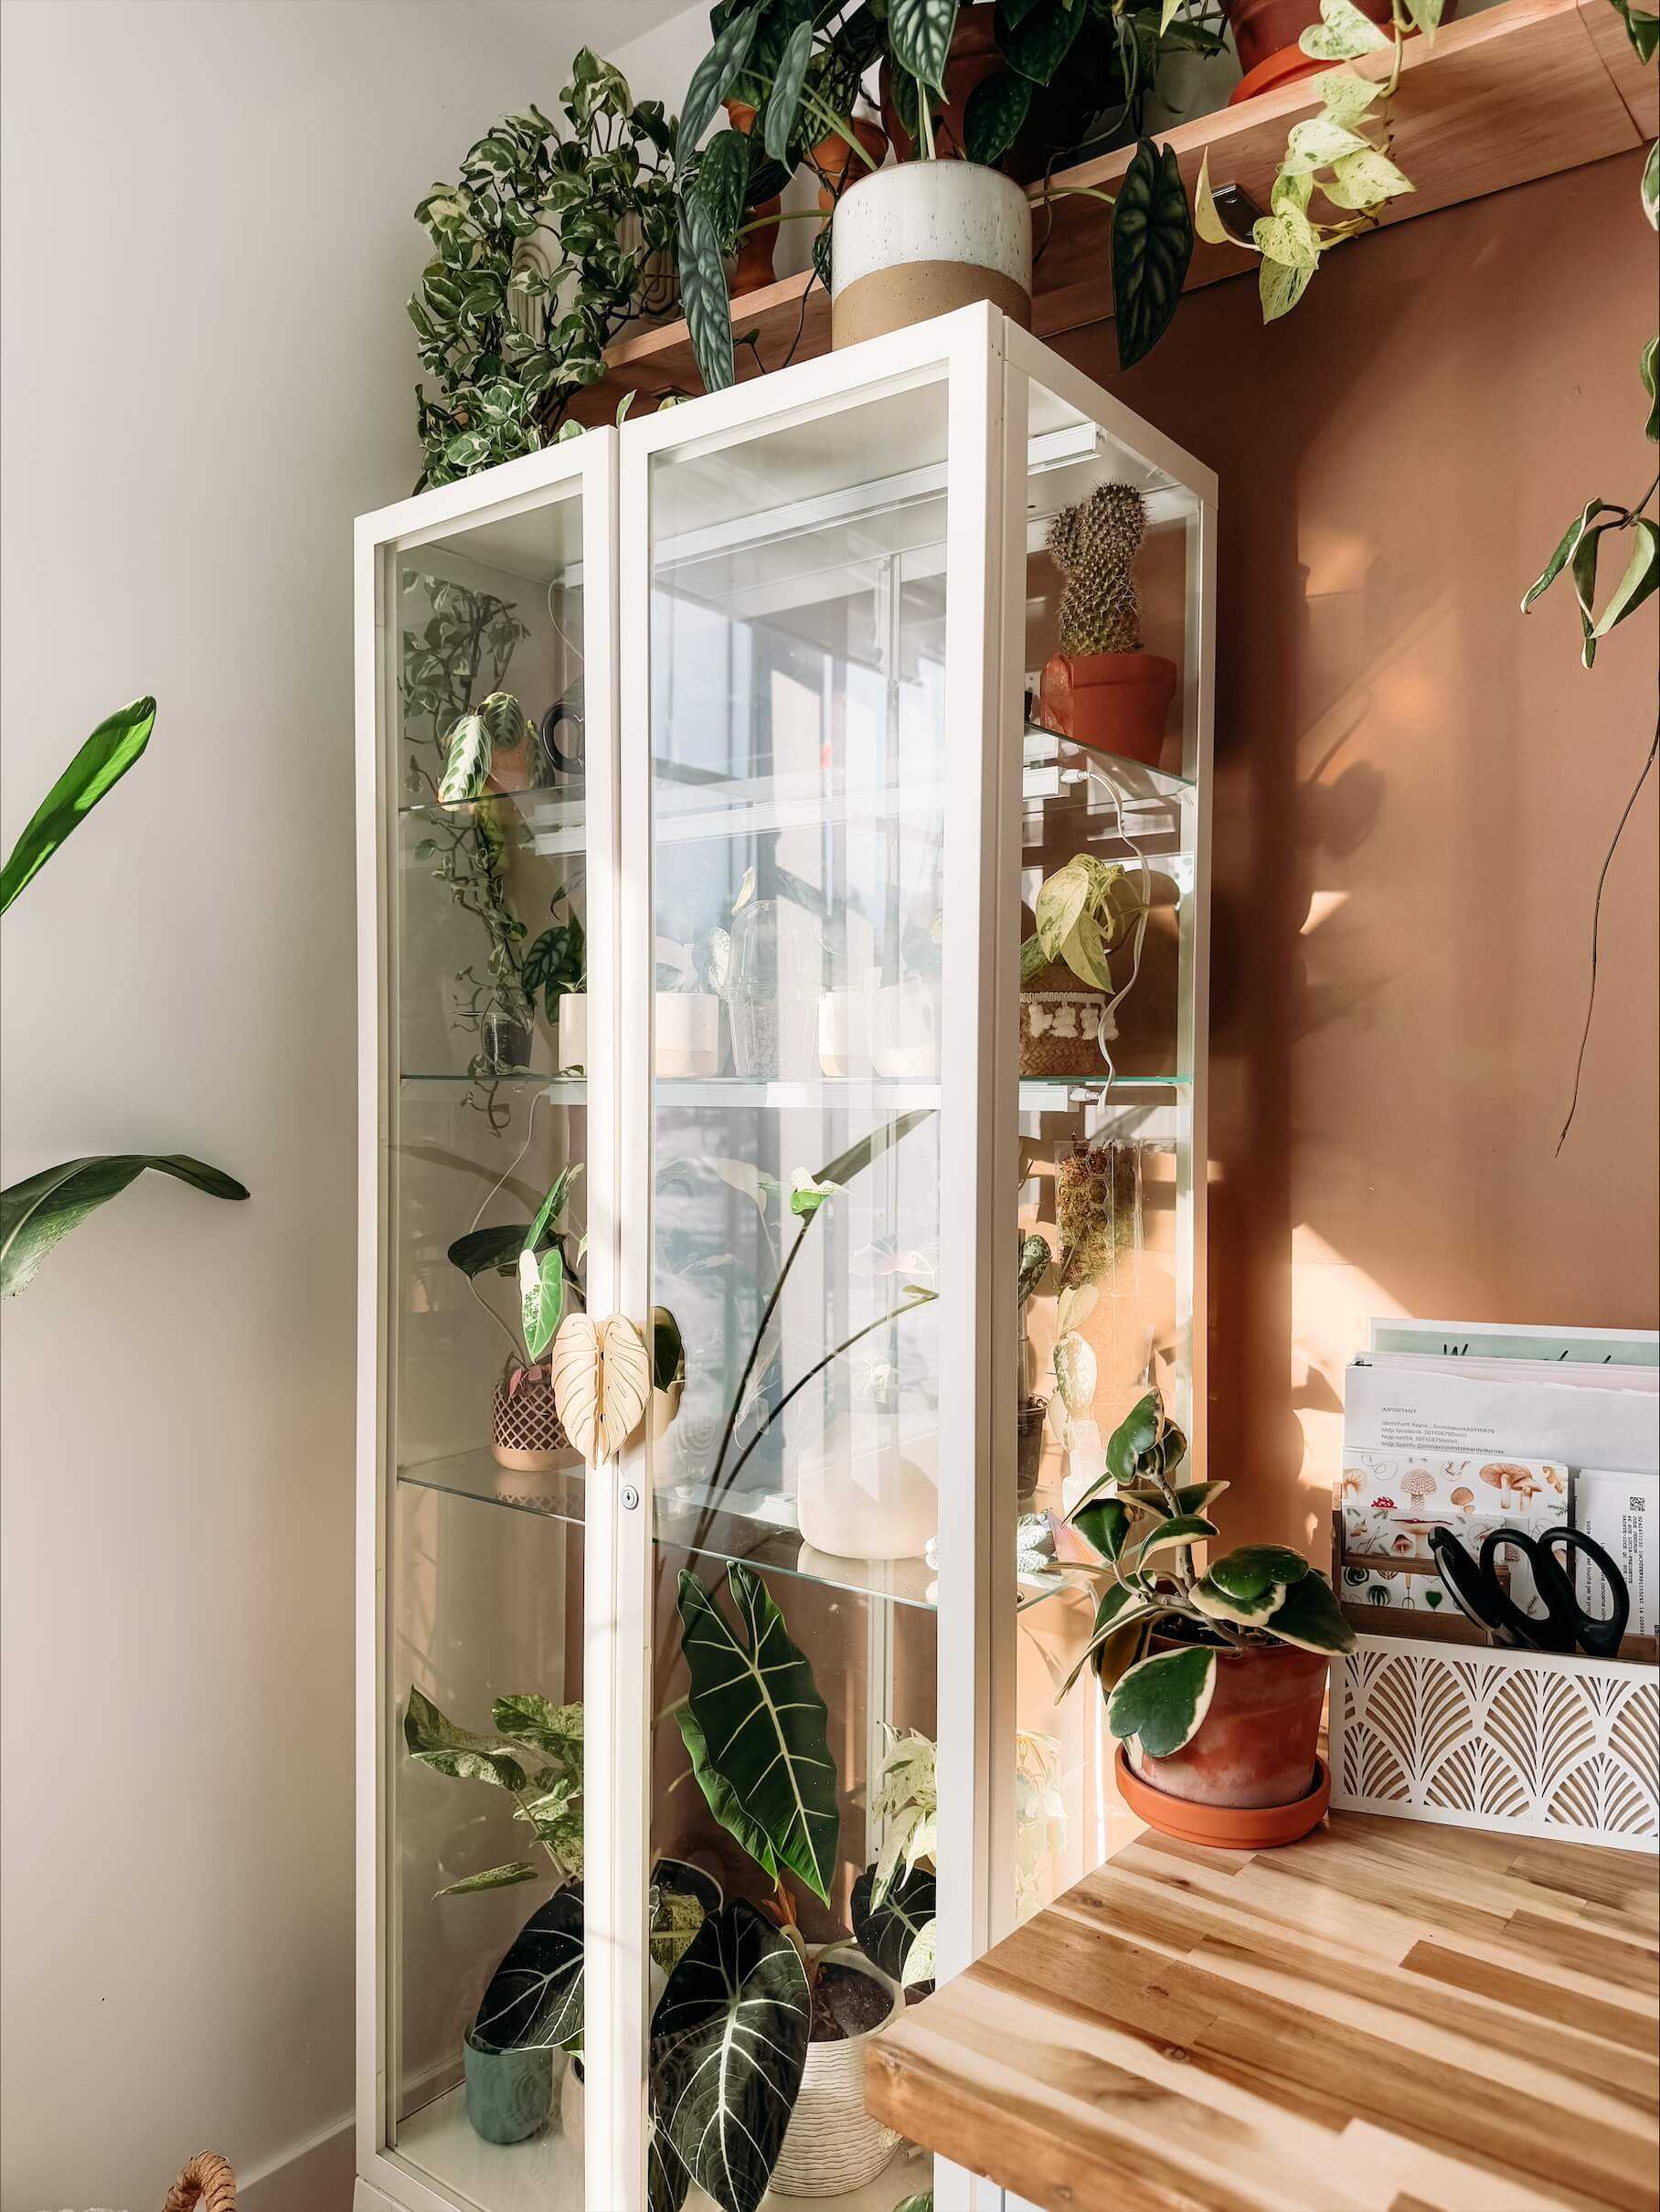
You may have already seen on social media: the famous glass shelf Milsbo from IKEA transformed into a greenhouse for indoor plants. It’s not only pretty in my decor, but it has real benefits for my little green girls. Today I wanted to explain how I made mine and what the benefits are of putting plants inside it.
Building the Greenhouse
To start, you will need the said shelf from IKEA. It is quite simple to install, but I recommend doing it with two people. What I find very cool is that you can place the shelves wherever you want. You can also move them as your plants grow. There are sets of shelves better suited for the Milsbo, which are sold separately online. These are corner shelves or even back walls that allow you to hang pots directly. (I would eventually like to modify mine with something like that!)
To finish the installation of the shelf, you will need to drill a hole in the metal shelf at the back to pass the wire of your grow lights through.
As for the grow lights, I used the Barinna t5 which are white and therefore, full spectrum. I fixed each light under each of the shelves. To pass the wires it’s quite simple: you just need to lift the shelves and just lay them back over the wires. No more complicated than that!
For my part, my Milsbo is simply like this. With several plants inside (about thirty) the humidity rises by itself between 60% and 80%. However, some plant enthusiasts will like to keep a very high humidity (especially for rarer plants or Alocasia). Therefore, you will need to add a small humidifier and ventilation. Many will use a computer fan to help ventilate the greenhouse. If you place a humidifier and do not add ventilation, the risk of mold is very present.
The Benefits
The first thing I will mention as a benefit is: humidity. Especially in winter, the ambient humidity is often insufficient in our homes for our pretty tropical green girls. So having your little greenhouse with a good humidity level will really help your plants. Next, it’s really the grow lights. Very often, in winter and autumn our plants lack light. Having lights in the shelf can really help your plants not to suffer from the lack of sunlight.
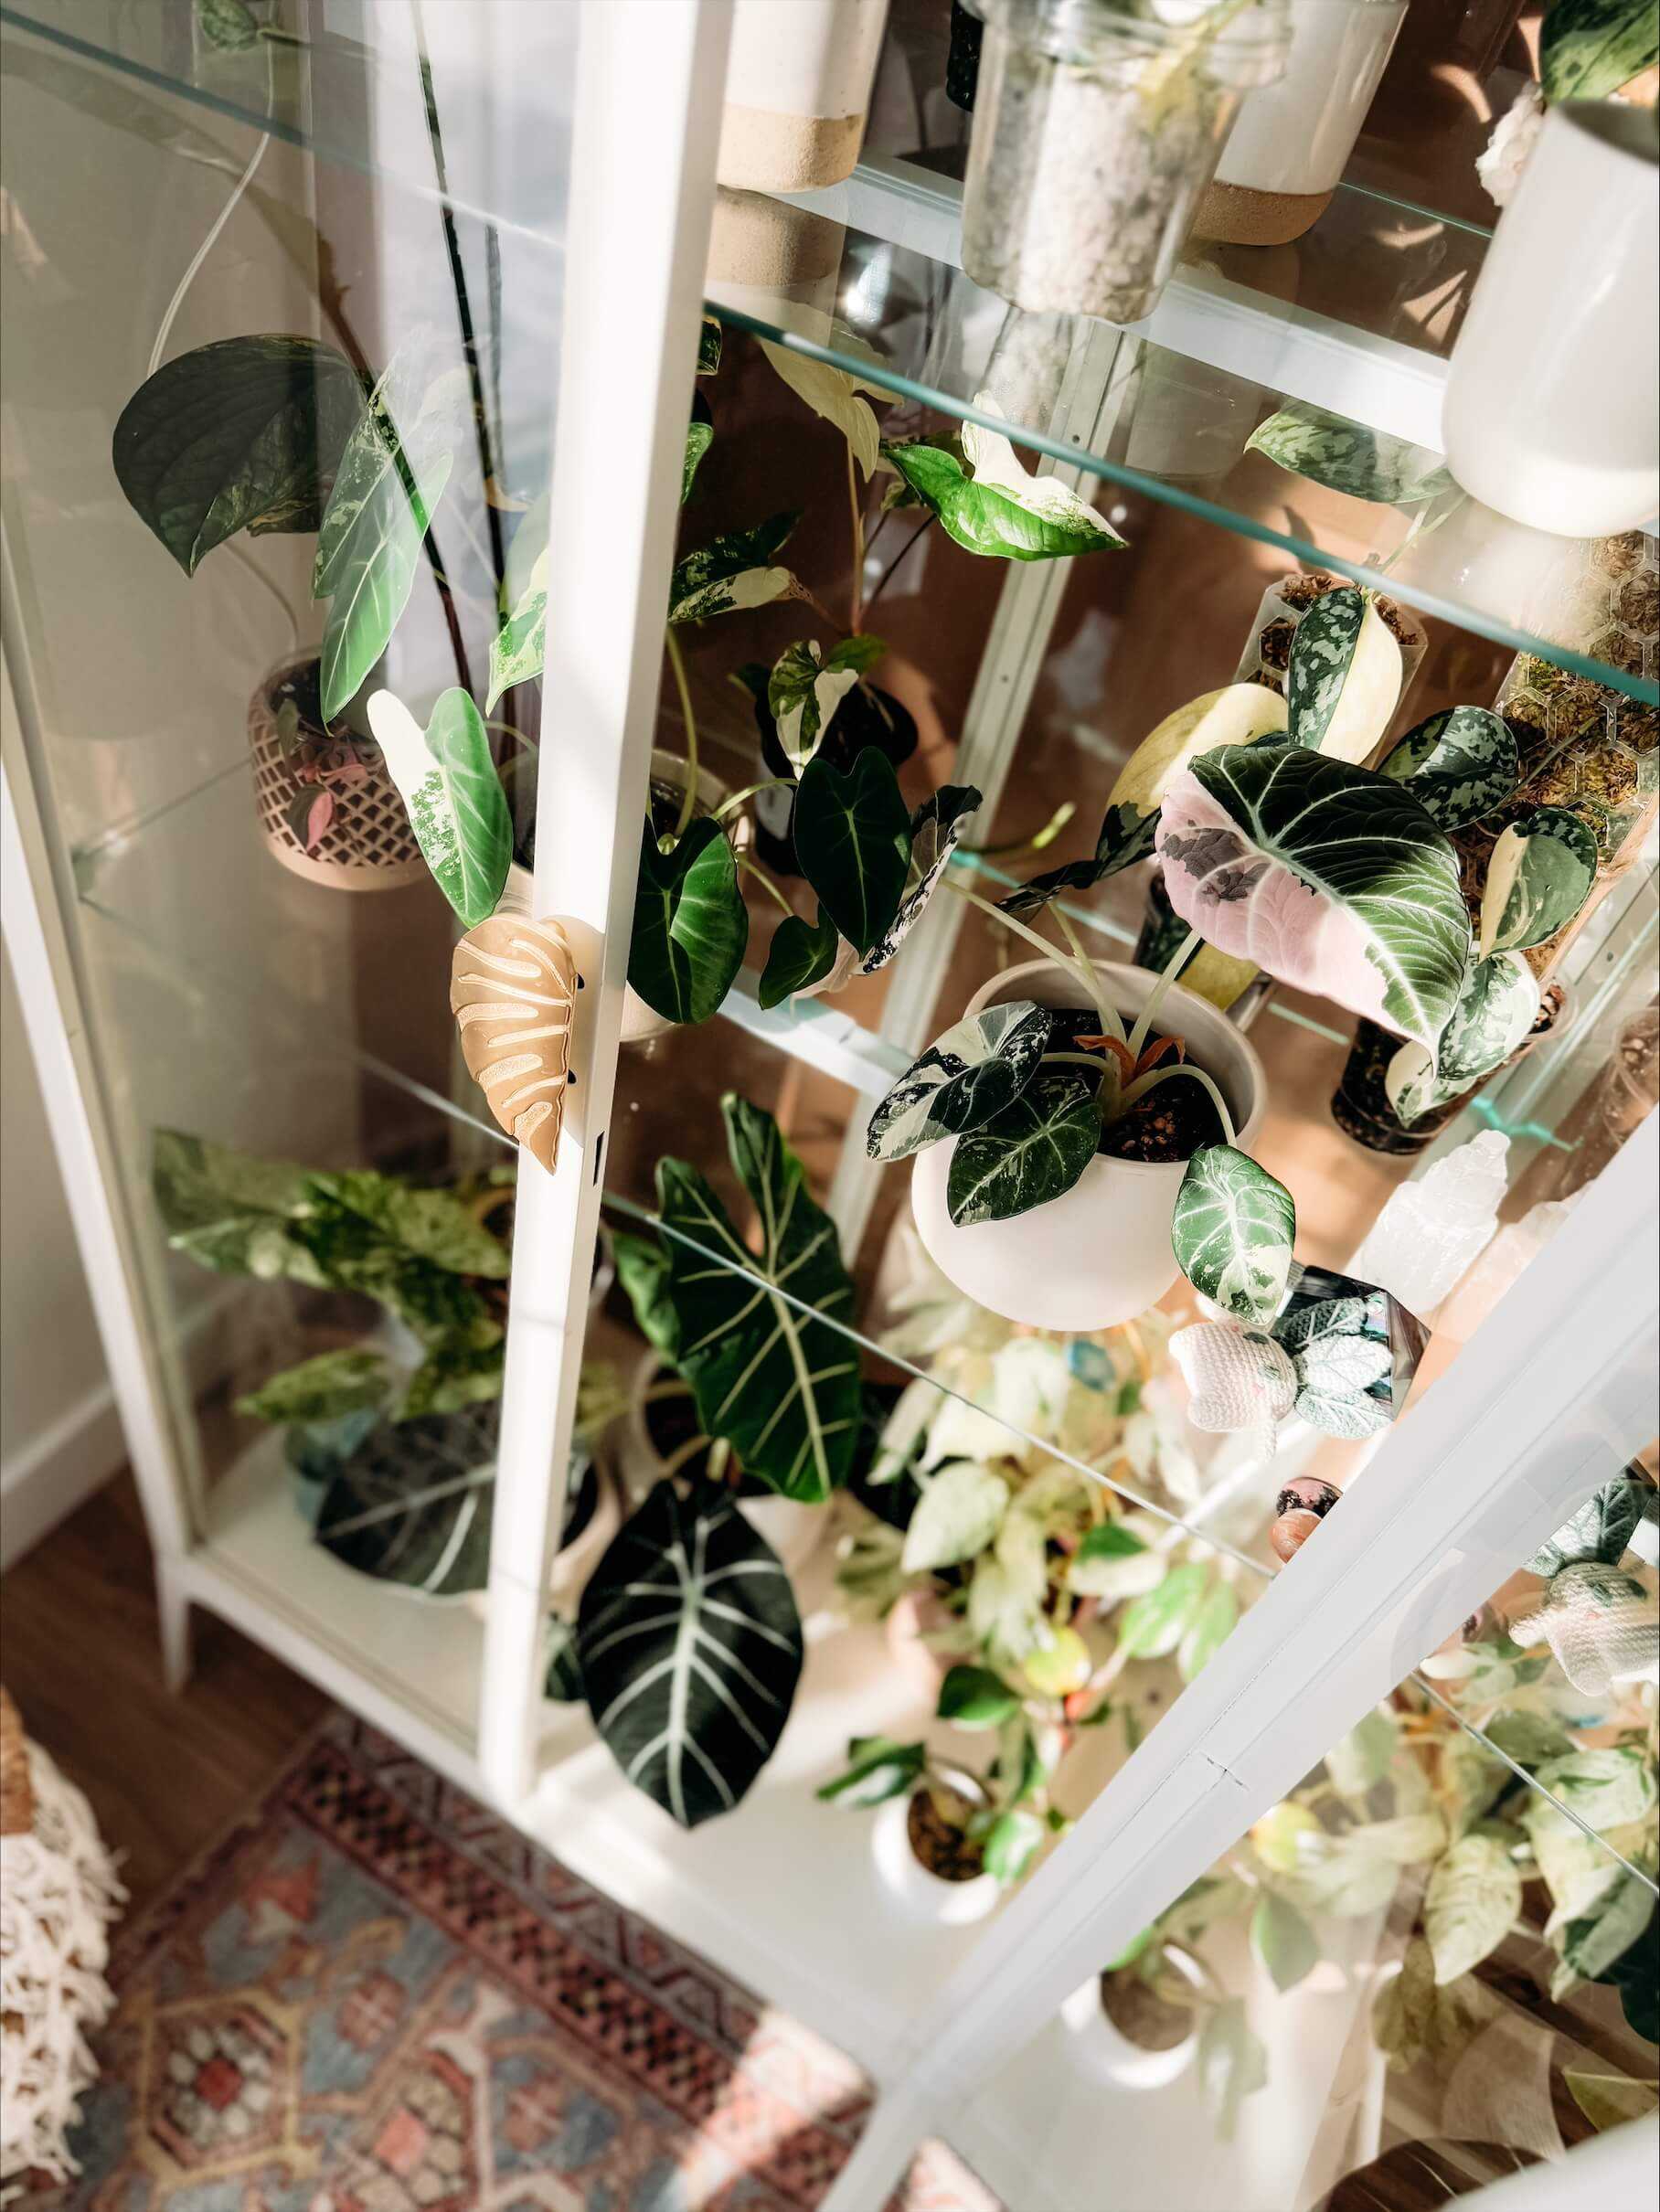
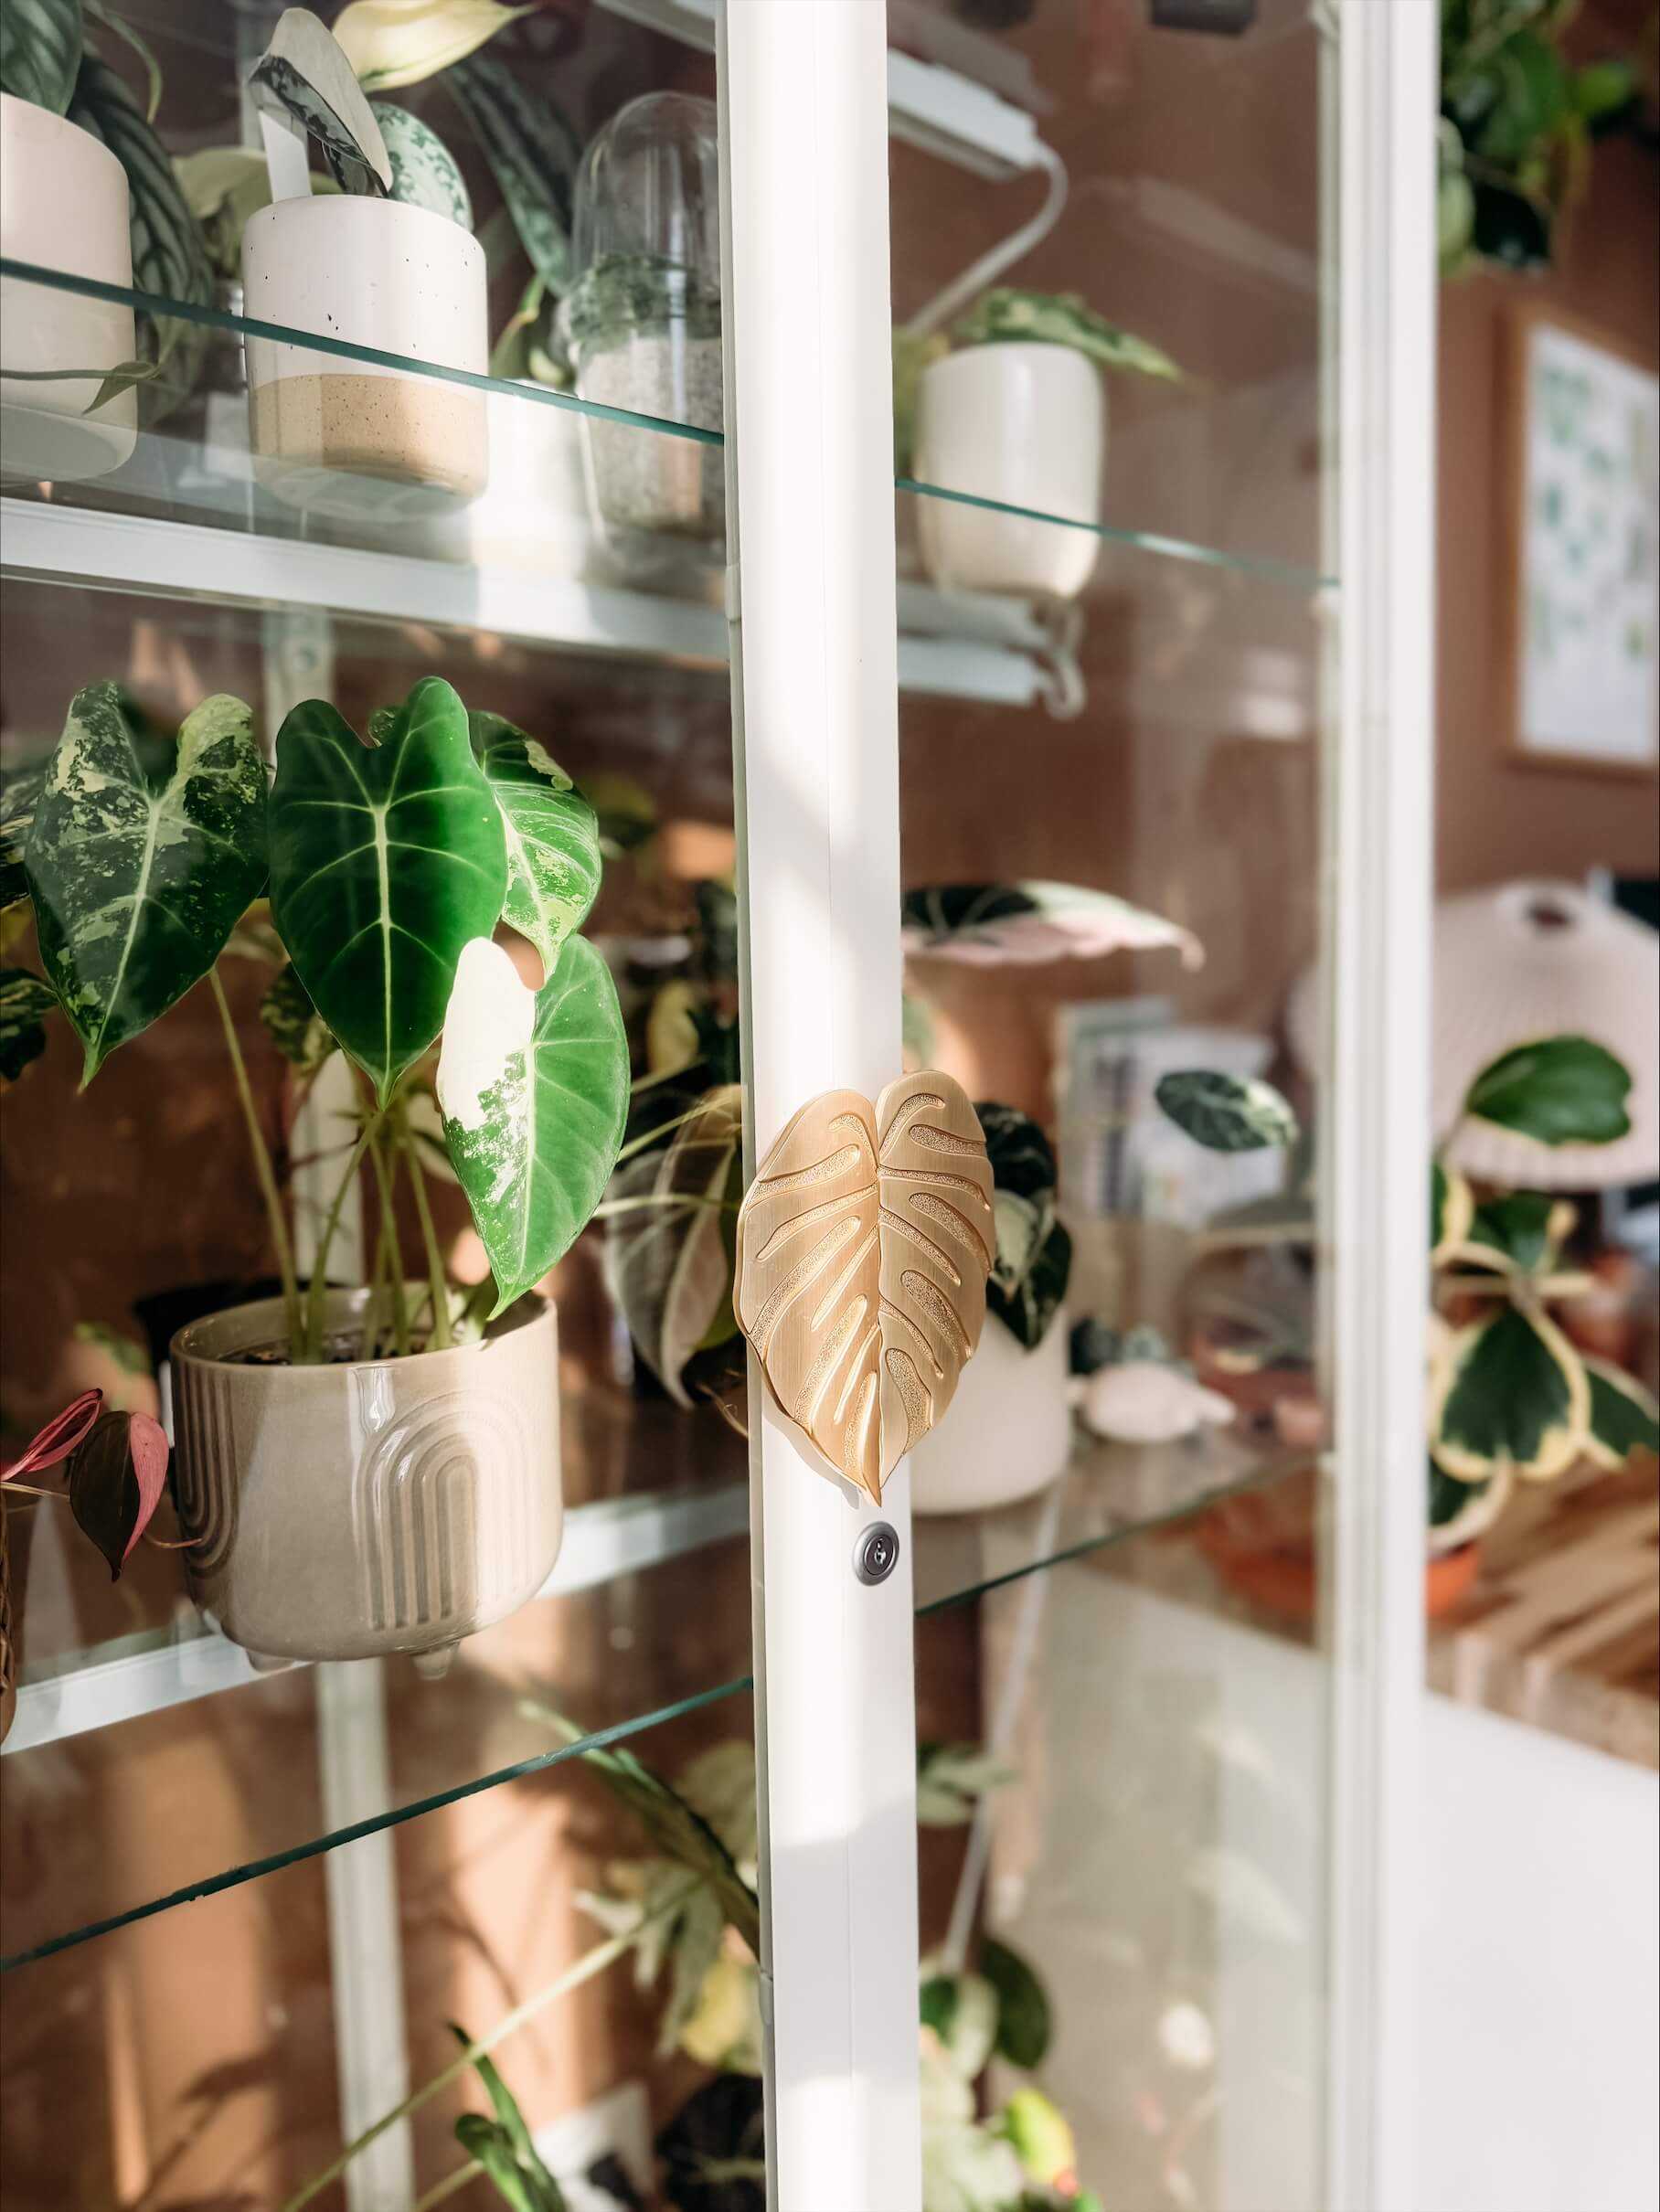
A little warning about the Milsbo and the grow lights: You need to ensure that our plants do not touch the lights. It has happened to me a few times to have leaves that got burned because they were stuck and I hadn’t realized it. Another thing, if you often turn on your lights, it may eventually cause your dark leaves to become lighter. So if you have a plant with darker foliage, do not put it in the Milsbo. I recommend putting your rarest plants and those with the most variegation on the leaves (like a Monstera deliciosa 'Albo' for example or an Epipremnum pinnatum 'Marble' which has a lot of white on the leaves or even the Philodendron 'Pink Princess' which has pink on its leaves).
I hope I have inspired you to create your little indoor greenhouse! Note that it is totally possible to do this kind of small DIY with another shelf than the one I’m talking about. Just have a very glassy piece of furniture like this one!
Tips and advice


